Keto Cheese Wrap

I have been doing Keto on and off for a few months. I can do a whole extra blog on why I found it good for me to use in my Low Carb Cycling. But for now, This post is to share my no/low carb replacement for tortilla/wrap options.

Side Note: this is my first attempt at sharing a video I created on YouTube. I am running on the basis that I should start somewhere so that I can get better! (Be gentle inter-world-Be gentle)

How To Make a Cheese Wrap Cheese Wrap 

Macros! Macros! Macros! The video shows me making a “Large” Wrap using 2 servings of Pre-shredded Mozzarella cheese. Depending on your Macros and needs, you should use the amount of Cheese that best fits your daily goals.

Ingredients

2 weighted servings of cheese (mozzarella, cheddar, Parmesan can be used)

Optional – you can add some seasoning to this layer. A scant amount will go a long way.

Steps:

  1. Weigh your cheese serving (s) using a food scale (If you are counting Macros strictly)
  2. Lay your cheese on parchment paper in an even single layer. (You want very little to no overlap at this step.)
  3. Place the cheese and parchment paper in your microwave
  4. Depending on your microwave cook 45 – 60 seconds.
  5. Microwaves vary. You will have to find the time that what works best for your unit that gives you the desired result
    * If you want a crispier texture out of the Mozzarella Wrap – add 10 seconds at a time until you yield your desired crisp
  6. Once cooked – you want to build your wrap fast so that its flexible enough for you to wrap as desired.
    * a crispy wrap like Parmesan cheese has to be moved very fast or else you will get a complete crumble (still delicious tho)

Give it a try! Let me know what you think!

❤ Monica

The Box Top Momma

I will preface this by saying – I AM NOT A COUPONER-

But I do want to be one in the worst way! I have a giving heart the size of Texas, and the time and wallet the size of Rhode Island.

Today I found myself in an accidental couponing zone. I think I fell into Novice Couponer territory as of today, and now I want more!

My Daughters School collects Box Tops. If you’re not familiar with Box Tops for Education it’s a program where schools can earn extra money to help support their programs. The school gets .10 cents per box top turned in.

I have been on the hunt. You can’t tell someone who loves to collect and plays major MMORPG’s just to farm, that they need to collect something. To me this is the most epic of Mommy Quests!

To-date I have collected 215 box tops this year! I am pretty proud of that! I would like to hit 500! Now I think I can!

So here I was – at Duane Reade picking up a few things when it hit me to check my Box Top App. That’s when the inspiration struck

I earned a total of 18 Box Tops in the photo below and spent $8.94 to do it – Let me explain how!

Duane Reade offers Balance Rewards. Often if you spend $25 or more they offer you $5.00 in store credit on your next visit. On that next visit you are welcomed to redeem your points however you like. What I love is that you are able to stack these points.

So I completed 2 Transactions

Transaction 1:

The Cereal was on sale for $3.49 a box when you use your store card
2 Boxes @ $3.49 was a total of $6.98
At checkout apply your $5.00 store credit
Total Final Cost: $1.98
Box tops Earned: 6 (2 via the packaging and 4 from using the Box Top App!)

Transaction 2:

I purchased 4 boxes of the Annie’s Mac n Cheese (no sale here – Bummer)
Each box @ $2.99 was a total of $11.96
At checkout apply your $5.00 store credit
Total Final Cost: $6.96
Box tops Earned: 12 (4 via the packaging and 8 from using the Box Top App!)

This was the first time I have ever hit a zone and it made sense. This is the start of something wonderful! Where are my coupon friends! Help me reach my goal of 100 box tops via the App!

Using the Box Top App

It could not be simpler! From the App you select the item you want to claim your Box Top Credits for, then the app Takes a photo (scans your receipt).
Once the receipt is processed – your credit goes straight to the school!

Box Top even doubles points by shopping at certain stores! So I will be on the look out for Stop-&-Shop deals to increase these cents for my daughters School. The donations of these box tops go to help fund the First Catholic School to have a Hydroponics Lab in a NYC!

The House Blend – Adobo

Note to Self:  When you say your blog is going to drop tonight – you should first note how long it’s going to take for your Google Photos to update so that you can add your images right to your blog without having to do a million extra steps! Always learning in Hindsight! Such is life!

If you’re Latino (or Latino Infused) you know Adobo. It’s about 1/3 of your genetic composition. So many different cultures use the term adobo and have their own spin to this crazy flash of flavor that makes food — FOOD WORTH EATING!

img_7829[1]

We know this brand – some people make the synomous connection between Goya and Adobo. There’s a wide range of variety for this ingredient. I don’t find them all to be equal – and a lot of times, not worth it. But Luckily for me, It also doesn’t matter. Cultural brainwashing is a thing. Even though I rarely ever use this container of “magic powder” (as my loving daughter calls it) I just can’t not have one around.

Let’s look at the ingredients that make up Goya Adobo

Salt – Granulated Garlic Powder – Some stuff I can’t pronounce -Oregano – Black Pepper – Turmeric.

Now, Let’s Look at making our own! With stuff we can pronounce and ingredients we can control the quality of. This is the step where you can choose all organic – or smoked garlic instead of regular garlic. Add a touch extra of a specific flavor you love! (So many possibilities)

This is in the order of ingredient importance to making a spanish style Adobo. (onion powder is optional, coriander is optional)img_7839[1]

I make a batch about once a month. I don’t use adobo in everything I cook. So this batch quantity lasts me at least a month.

Monica’s Homemade Adobo

img_7833[1]

3 – 4 Tablespoons of Course Pink Himalayan Salt (This is to each users preference – I use 3 and a smidge in my batch)

1/2 Cup of Granulated Garlic

1/4 cup Dried Oregano

2 Teaspoons of Fresh Cracked Pepper

1 Tablespoons of  Granulated Onion Powder

2 Tablespoons of Tumeric

2 Teaspoons of Toasted Coriander Seeds

Place all the ingredients in a blender and blend until all seasonings have combined down to a fine powder.

I use my single serve Ninja Smoothie cup to create my Adobo. It’s the perfect size to process my individual batches.

The results are pretty awesome! The image on the left is the store bough Goya Adobo. The Photo on the Right is my home made mix! Most people wouldn’t be able to tell the difference. Blending the ingredients makes all the difference.

This Adobo is the perfect base to get creative! Try and make a SPICY Adobo! Add a bit of Cayenne pepper and blow your own mind!  🙂

img_7834[1]

On Facebook I promised ADOBO”S” Like Multiple! So here is the Second House Blend! (This is my most used seasoning)

A large percentage of the time – I use my own house seasoning. I make the base seasoning below MINUS salt. This allows me to control the salt content of each dish.

Monica’s House Season

0 salt

1/4 cup Granulated Garlic

3 Tablespoons Smoked Chili Powder (This is not spicy)

3 Tablespoons of Dried Oregano

2 Tablespoons of Dried Thyme

2  Teaspoons of Fresh Cracked Black Pepper

Mix all ingredients in a jar and set to the side. Shake your container each time before use.

img_7842[1]

The first step to great food is great flavor! Don’t be afraid to make some seasoning mixes of your own and make your cooking something that is instinctively yours!  ~.M<3

My Foodie eye to the streets, these are Channels I’m super into this week! Check them out!

Not Another Cooking Show

Sauce Stache

Seonkyoung Longest

Homemade Cold Brew Cold Foam Coffee

Every morning before Coffee I recite the the bad guy A-nom mantra:

“I’m bad. And that’s good. I will never be good. And that’s not bad. There’s no one I’d rather be than me.”

ColdBrewThen… I have coffee.. Then I’m a good guy. and that’s not bad.

In the last month I have very shamefully spent my children’s first year college tuition at Starbucks being completed addicted to their new Cascara Cold Brew Cold Foam drink. It not only comes with a cool ass lid (which is half my addiction) but it also has what I like to think A Coffee Lovers Flavor Profile.

The Cascara Cold Brew Cold Foam is slightly sweet, with the perfect taste of a light sweet foam sitting on top, so if you’re a black coffee drinker you get what you want, and if you’re not, makes you think “Why haven’t I been drinking a black coffee more often?!”

My closest Starbucks is a beautiful 15 min walk away on a good day, and the longest 45 minute walk when I have my kids in tow. It’s summertime, MY-KIDS-ARE-ALWAYS-IN-TOW!

So the solution – SAVE TIME AND MONEY – DO IT AT HOME!

COLD BREW COFFEE  Concentrate

Ingredients:
10oz Espresso Grind (MUST be an Espresso Grind)
14 cups of water
Patience

Tools
A container slightly larger than 1 gallon
Cheese Cloth or Coffee Strainer (Some people call it a coffee Sock)
Laddle

Steps:
IMG_4806[1]1. Put 14 cups of water into your container. This container should have a lid.
2. Slowly incorporate the 10oz ground package of Espresso Ground coffee. (I used Bustelo because it has a deep flavor that stands up great in a coffee concentrate. As your ice melts you won’t lose your coffee’s flavor)
3. Using a wooden spoon stir and incorporate until it appears all the coffee has been mixed completely into the water.
4. Cover and let sit on a counter for at least 8 hours to overnight. My sweet point seems to be 14 hours. (Mostly its where my patience ends and I need to just get it ready for the next day.

Straining your cold brew. (2 methods)
* A majority of the grinds should be firmly packed at the bottom by the time its ready to strain. Don’t over stir or mix at this point. You want to deal with as little grinds during the straining method as possible.
* This is just my “I refuse to buy a fancy kit when I’m a kitchen Macgyver! There are fancy kits you can buy that can make this process easier.

Cheesecloth Straining:
1. Place your cheesecloth in colander. Place that colander over the another container so that as you pour your coffee through it collects the grinds and let’s your coffee drip through. (The slower you pour the better.)
* You could also ladle this mixture instead of doing a whole pour. I prefer the ladle method – It results in dealing with less grinds during the straining step)
2. Once all your mixture has been poured, gather the cheese cloth and give it a good squeeze to get all your cold brew out.
3. Throw the grounds out, rinse the cloth of all grounds and do one more pass of the coffee to ensure a complete grind free coffee.

Coffee Sock
coffee sock
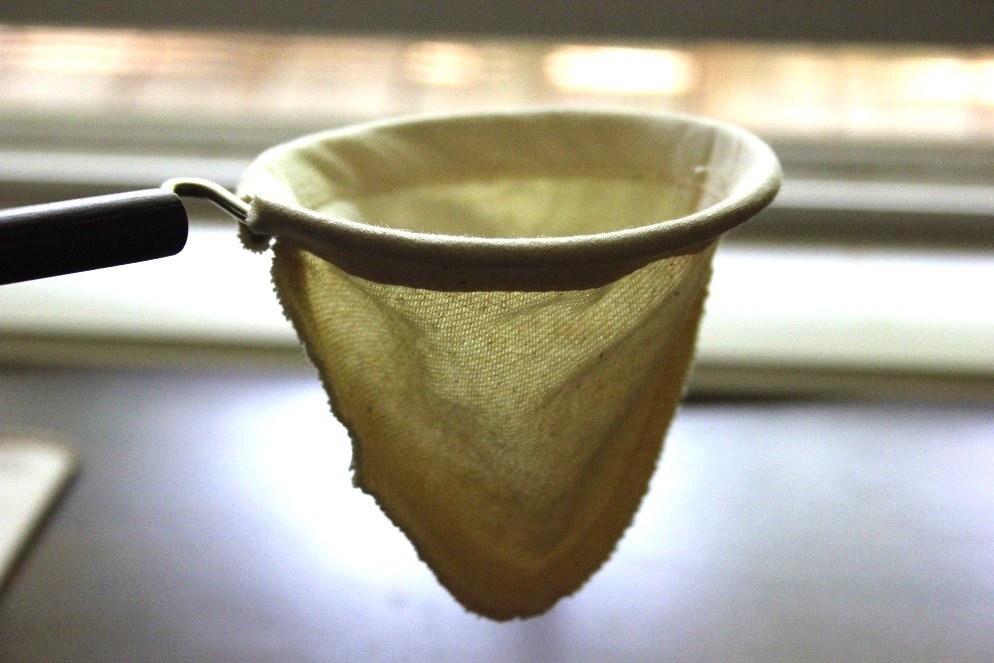
1. Place the coffee sock over your container and ladle the cold brew through your coffee sock. (This method goes pretty quickly at first because the top of the cold brew mix will be free of coffee grinds)
2. As you get towards the bottom and the drip slows down, feel free to use your hands to squeeze and help the drip along. (you may need to empty your coffee socks a few time towards the end of the straining process.)
3. Give the Coffee Sock a good rinse and pass your coffee through one more time just to make sure that you have removed all grinds from your coffee.

Making Cold Foam

This process requires a strong blender, or a tool called a Frother. You can skip the cold foam part and enjoy your delicious iced coffee.

Starbucks uses Skim-Milk or Fat Free milk to make the foam! It’s hard to believe but true! I didn’t have either on hand so I used Full Fat milk (Whole Milk) – The only difference it takes more patience and a bit longer to get the foam. But same great results.

The secret to Cold Foam in a Blender? (I have Ninja Blender – I could mxi cement in that thing starting from straight rocks) – THE PULSE! It’s important to pulse. That’s how you incorporate the air into the milk to get you a good frothy foam.

1. 1/3 cup of milk in a single serve blender cup
2. Place your single Serve cup on your blender base
3. Process fast for 30 seconds then begin to pulse.

Blend – wait for the milk to fall to the bottom and Pulse. You want to pulse in 3 counts
and continue this process for 1 -2 mins. (If you’re using Skim or FF Milk this will be a faster process)

“Monica.. WTF does that mean?! ”

Press the button, count to 3 – release, and count to 3 – press the button, and count to 3 – release and count to 3 – Rinse repeat for 1-2 mins (If using whole milk – Low Fat Milk will come together faster).

No one said being extra wouldn’t require work :: insert eye roll::

* Building Your Home Made Cascara Cold Brew Cold Foam *

The coffee is slightly sweetened at starbucks. Pour your delicious cold brew coffee into your glass and stir in a small amount of sugar. I added about 1/2 teaspoon to my 6oz serving (If you’re a condiment borrower [no judgement] that is the same as 1 borrowed pre-packed sugar pack)

Grab a glass that holds at least 12oz of liquid
Add 3-4 ice cubes
Pour in your pre-sweetened cold brew
Grab your fancy homemade cold foam and spoon the foam on top of your beverage

*Giggle* and say “you bishes aint as fancy as me” and walk away proud!
Then tag me on IG if you try it! @monirodimusprime